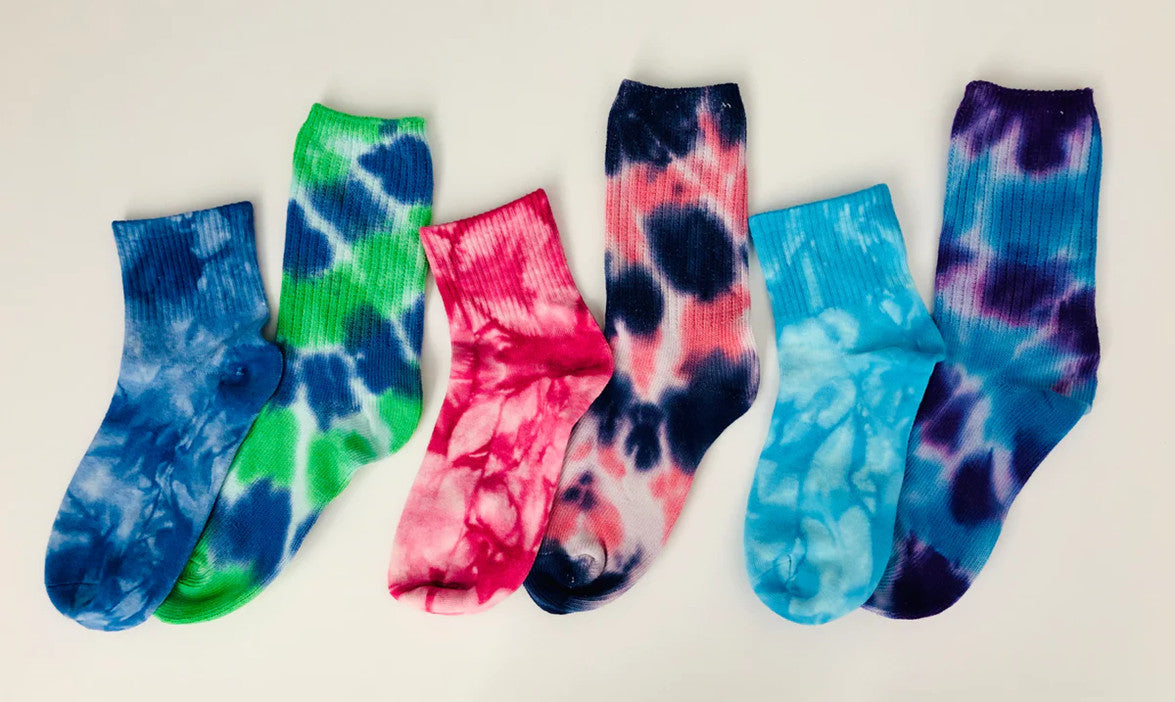
Attention, craft enthusiasts! Are you eager to enter the fascinating world of tie-dyeing socks? Look no further for expert guidance on how-to-tye-dye-socks. Our comprehensive step-by-step guide will equip you with the skills to tie-dye socks like a seasoned pro. Learn the art of color selection, explore various techniques, and unlock your unique creativity. You'll have the power to transform ordinary socks into stunning, one-of-a-kind masterpieces.
To get started, you'll need the right tools. We recommend the Tie-Dye Kit for Kids and Adults. You can find the kit at Purchase Tie-Dye Kit Here. It includes all materials you need to begin your tie-dyeing journey.
What kind of socks can you tie dye?
Now you are one step close to starting! First, you need to choose socks for tie-dying. We suggest using plain white socks that label a high percentage of natural fibers, at least 50%, for cotton because the synthetic fibers, including polyester, nylon, and spandex, don't absorb the dye very well from the tye-dye kit, and the color will fade away in the wash very soon. A little is fine because it makes the tie-dyed socks more elastic and remains in better shape. Make sure you got the correct type of socks for tie-dying.
Materials to tie dye socks:
● White Cotton Socks (Old and clean white socks apply as well)
● Tie Dye Kit (Get the same tie-dye kit here)
● Latex Gloves
● Soda Ash(Read the instructions of the tie-dye kit you have to ensure whether you need this)
● Rubber Bands
● Plastic Wrap
● Paper Towels
● Squeeze bottles
● Apron
How to tie dye socks?
We are ready to go once all the tie-dye materials are in place!
Step 1: Set up your workspace.
Prepare a table and cover its surface with a plastic tablecloth. Wear an apron in case of accidental dye spray and gloves to protect your hands.
Step 2: Prepare the socks.
Pre-wash the socks for tye dying with detergent in order to remove any oil, dirt, and chemicals. About whether you need to pre-soak the socks in ash water, read the instruction book of the tie-dye kit you bought and follow the steps according to its instruction strictly. Usually, you only need to soak the socks in for about 15 minutes. This process will change the pH level of the surface of the socks and create the perfect environment for the dye to stick on.
Step 3: Mix the dyes.
Follow the package instructions and mix the dye. You can even mix two different colors of dyes to create a new color.
Step 4: Tie your socks.
If your socks for tye dying have been pre-soaked, wear gloves before touching them. Use the rubber bands to tie the socks in any way you prefer, which is an excellent opportunity to explore options such as ordinary spiral, scrunch them up, or accordion fold.
Step 5: Apply the dye.
Once all the socks are tied up, it's your creative time! Prepare your squeeze bottle filled with an ample amount of vibrant dyes. Apply the dyes generously to tie dying socks, employing various techniques such as delicate dabbing or playful spraying. Ensure that the vivid hues thoroughly penetrate every fold and crease of the fabric, allowing the colors to merge and mingle harmoniously.

Step 6: Wrap the socks
It is advisable to follow a few essential steps to ensure the dye sets effectively on your tye-dye socks and brings the best colors. After completing the dyeing process, take the extra step of wrapping the socks with plastic wrap. This protective covering will help retain moisture within the fabric, facilitating the dye's absorption and longevity. Additionally, if you can maintain a temperature of around 70 degrees, it aids in preserving the vividness of the colors. Allow the tie-dyed socks to stand undisturbed for 24 hours, allowing the magic of the dye to unfold. Patience and anticipation are critical, as the final result will reward you with a beautifully vibrant and unique tie-dye sock.
Step 7: Rinse and wash the sock.
After creating your DIY tie-dye socks, the final step is to rinse and wash them. Thoroughly rinse the socks in cold water until the water runs clear. It is recommended to repeat the rinsing process a few times. Wash the socks separately to avoid any dye residue clinging on. Use gentle cycles and mild detergents to launder them, preserving the colors. After washing, air dry or use a low heat setting in the dryer. Once dry, your unique tie-dying socks are ready to wear, adding a stylish touch to your outfits.
Tie-dye sock patterns /Folding Techniques:
Striped
If you want to achieve striped tie-dye socks, a simple technique involves extending the socks and bundling them together using rubber bands at regular intervals along their entire length, typically every inch or so. This method ensures symmetrical stripes across both tye dyeing socks. For a touch of creativity, you can explore different folding ways or experiment by randomly pinching off small sections of the socks and securing them with rubber bands.
Swirl
Swirling socks together into a spiral resembling a cinnamon bun. Once twisted, secure the socks with rubber bands. To maintain the stability of the spiral's center while rotating the socks around it, utilizing a clothespin can be beneficial. This technique combines ease and effectiveness, ensuring a captivating spiral pattern on your tie-dyed socks.
Crumple
To begin, place the moist socks for tie dying flat on your work surface. Proceed by randomly scrunching small sections of the fabric together. Continue scrunching and folding, gradually gathering the socks into a compact, flattened disk. Once in the desired shape, secure the socks with multiple rubber bands. Now, it's time to let your creativity fly and apply the dye as you see fit. Let your imagination guide you in creating vibrant patterns and designs on the scrunched fabric.


![[Starter Kit] Auto Heat Press Machine 15" x 15" 110V + Starter Kit Bundle](http://www.htvront.com/cdn/shop/files/20240425-170634_385x.jpg?v=1714036345)
![[Premium Bundle] Auto Heat Press Machine 15" x 15" 110V + 20 rolls HTV Bundle 12“x3ft + Mini 2 Heat Press Machine + Random Sublimation & HTV Bundle ≥ $180](http://www.htvront.com/cdn/shop/files/1UK_4_22c12b1b-12dd-4105-ac25-93e2faae6a8c_385x.jpg?v=1713863580)