


Cricut Explore Air 2 is one of the most complete DIY cutting machines around. This machine can cut pretty much any design and shape, including stickers, paper crafts, cards, and more. It also provides Bluetooth connectivity with your computer to create and retouch designs on Design Space.
However, one of the main drawbacks of this machine is its complex nature. For this reason, it’s vital to learn how to use Cricut Explore Air 2 before diving deeper into your DIY crafts. That’s why this in-depth Cricut Explore Air 2 guide will help you achieve. Continue scrolling until the end!
Part 1: Features of Cricut Explore Air 2
Cricut is a famous brand that creates PC-controlled cutting machines for DIY projects. These machines come in several models, including Cricut Maker, Cricut Explore, and Cricut Joy. As the name hints, the Explore Air 2 machine is part of the Explore family and is the latest model in that line after Cricut discontinued its predecessor.
In order to learn how to use a Cricut Explore Air 2 machine effectively, it’s essential to know its important features. For starters, Cricut Explore Air 2 is compatible with six tools to help you cut, score, write, and perform other duties. Below are the tools that can work with Explore Air 2:
- Premium Fine-Point Blade
- Deep Point Blade
- Bonded-Fabric Blade
- Foil Transfer Tool
- Scoring Stylus
- Fine-Point Pencil
In addition, this machine comes with other innovative features that make it stand out among other cutting machines. They include:
- Cricut Explore Air 2 is designed to work with 100+ materials, including vinyl, cardstock, iron-on, glitter paper, and bonded fabric.
- It has a material selection Smart Dial for precision cutting.
- The Fast Mode feature allows you to write and cut materials up to 2x quicker than previous models.
- Inbuilt tool holder and extra storage to keep your materials within reach.
Part 2: What Do I Need to Get Started with Cricut Explore Air 2?
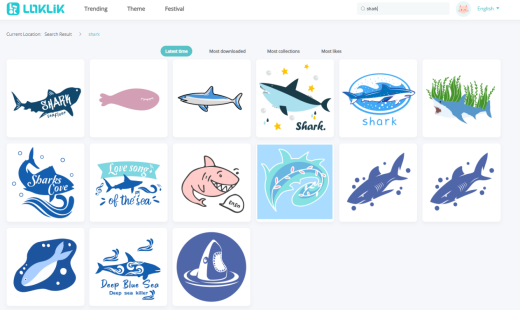
Before we dive further into this Cricut Explore Air 2 how to use tutorial, let’s discuss the materials that you’ll need for the project. For example, my daughter asked me to design a DIY shark sticker, so I prepared the following items:
- First, you must install the Cricut Design Space app on your Android, iOS, Windows, or Mac device. You’ll need this software to set up and use Cricut Explore Air 2.
- Next, you’ll need to set up your Cricut plotter correctly. Power the machine on, then find out if your machine is listed in your PC’s Bluetooth list. Pair the machine with your PC.
- Another material you’ll need for this project is adhesive vinyl. These materials can come in different forms, including mirror metallic, holographic, color-changing, and more.
- You’ll also need a transfer tape that works with adhesive vinyl. These sticky materials let you quickly transfer your designs and release the vinyl.
- Cricut Explore Air 2 often comes boxed with a toolkit. The kit includes a cutting mat, scraper, spatula, scissors, weeding tool, and tweezers.
Part 3: How to Use Cricut Explore Air 2?
So, without further ado, let me teach you how to use my Cricut Explore Air 2 to create a shark design. Follow me!
Step 1: Create an image in Cricut Design Space.
The first step to crafting using the Explore Air 2 machine is creating an image using Design Space. It’s a relatively straightforward program to use. Start a New Project on Design Space, then upload your image to start customizing it. You can find many shark designs to use on this project on Loklikworkshop.com.
To add an SVG photo to a project on Design Space, click the Upload button at the bottom of the left rail. Once uploaded, adjust the image size depending on your project preference. You can also purchase ready-made image designs from Design Space by clicking the Templates icon. Don’t forget to click the drop-down button at the top-right corner and select Cricut Explore Family.

Step 2: Cut and Weed Your Image.
Up to here, you should already have your project set up and the Explore Air machine plugged in. Now it’s time to perform your first cut with the machine. To do that, pick up your vinyl material and put it on the Cricut mat.
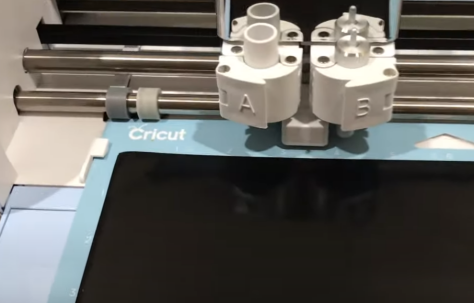
Gently load the mat into the machine, then make your project using Design Space. This cutting machine will check whether you’re using the right tool for the project and start cutting. The “C” button will start blinking when everything is ready to cut. Press that button to begin the cutting process.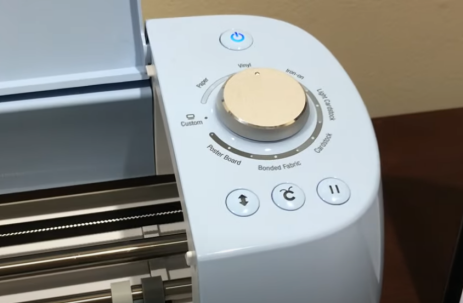
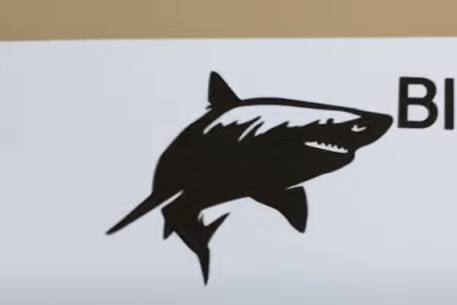
Step 3: Weed Out the Adhesive Vinyl.
You can now close your computer or Design Space because you won’t need it again. The next stage is to weed the design, essentially removing the unneeded adhesive vinyl. You can gently use your hand to pull out the excess vinyl and remain with the shark design. But if you don’t have a steady hand, use a weeding tool to pull out the extra vinyl.

Step 4: Finish Your Project
We are pretty sure you have finished designing, cutting, and weeding out excess vinyl from your design. The next step is to transfer the design to whatever surface you want to apply it on.
To apply your design, peel off your transfer tape, then gently apply it to the Cricut design. You can ensure the transfer tape properly sticks to the vinyl design by pressing it gently using a squeegee.

Proceed to pull out the transfer tape from the vinyl. You’ll see the design applied to the transfer taper. If impressed, gently place the transfer tape with your design on your preferred surface, then press it to ensure it sticks. Lastly, peel off the transfer tape to leave the Cricut design on your surface. It’s that easy!
Note: It’s important to note that the Explore Air 2 machine can take longer to cut specific materials. But the good news is that this machine works with 100+ materials, so you’ll always have options when cutting designs.
Final Words
Do you have any questions or compliments regarding how to use Cricut Explore Air 2? Please write a comment. With Cricut Explore Air 2, you’ll get a fast, silent, and pocket-friendly cutting machine that’s almost as efficient as Cricut Maker 3. It can cut hundreds of materials, including wood, although you’ll need different cutting blades for certain materials. We hope this simple tutorial was helpful!


![[Starter Kit] Auto Heat Press Machine 15" x 15" 110V + Starter Kit Bundle](http://www.htvront.com/cdn/shop/files/20240425-170634_385x.jpg?v=1714036345)
![[Premium Bundle] Auto Heat Press Machine 15" x 15" 110V + 20 rolls HTV Bundle 12“x3ft + Mini 2 Heat Press Machine + Random Sublimation & HTV Bundle ≥ $180](http://www.htvront.com/cdn/shop/files/1UK_4_22c12b1b-12dd-4105-ac25-93e2faae6a8c_385x.jpg?v=1713863580)


