


Photo transfers used to be challenging due to the complex process. Then, with the help of photo transfer paper, anyone could scan, duplicate, and print images while relaxing in their home or studio. Inkjet prints are easier to transfer and are much safer to use. Depending on the surface you're moving the image on, there are many types of transfer paper for photos.
Thus, we shall go through the following parts to explore transfer photo to paper:
Part 1: What kind of transfer paper do you need to transfer a photo?
Part 2: How to transfer a photo to a shirt
Part 3: How to transfer a photo to a mug
Part 4: How to transfer a photo to a keychain
Part 1: What kind of transfer paper do you need to transfer a photo?
You need to pick the right photo transfer paper when transferring photos onto different surfaces. The type of transfer paper largely relies on the material you intend to transfer the photo to paper.
Here's a table to help you decide on the suitable transfer paper for various surfaces:
|
Different Surfaces |
Transfer Paper |
|
T-Shirts |
Sublimation paper is an excellent option for transferring images to fabric. This process involves directly changing ink from solid to gas onto the fabric, resulting in vivid and enduring prints. This method is for crafting personalized T-shirts and other types of apparel. |
|
Blank Slate Surfaces |
Sublimation paper: Using sublimation paper, you can customize blank slate surfaces, such as ceramic tiles or coasters. This method ensures robust and professional-looking image transfers that adhere well to these smooth surfaces. |
|
Wood |
Wax paper: It's a straightforward technique that entails printing the photo onto wax paper and then utilizing heat to transfer the image onto the wood. The wax content in the paper aids in binding the ink to the wood's surface. |
|
Mugs |
Clear Sticker Paper: This paper lets you print the image onto a transparent adhesive material that you can directly apply to the mug's surface. It lends a neat and polished appearance to your custom mugs. |
|
Glass Picture Frames |
Sublimation Paper: Sublimation paper continues to be a fitting choice when dealing with glass surfaces like picture frames. The procedure yields sharp, vibrant images that can endure over time while seamlessly adhering to the glass. |
Opting for the appropriate photo transfer paper is crucial for professional-grade outcomes. So, match the suitable transfer paper with the material you're working on, unlock your inventiveness, and personalize many items with your treasured photos.
Choosing quality transfer paper is the key to successful DIY crafts, but do you still worry about its price? Would you love to know where you can get affordable transfer paper nearby? You may want to read this article: How to Get Affordable Transfer Papers.
Part 2: How to transfer a photo to a shirt
Transfer an image to a shirt easily using these simple steps:
Step 1: Find an image on glossy magazine paper or print it using an inkjet printer.
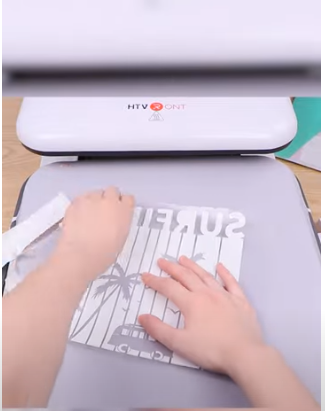
Step 2: Place the image facing down on a sizable piece of plastic wrap. Then, properly fold over the excess wrap to rest against the print's reverse.
After that, press your shirt to make the image's surface level and smooth.
Step 3: Place the print in its plastic wrapper on top of the garment with the face side down and hold it using tape.
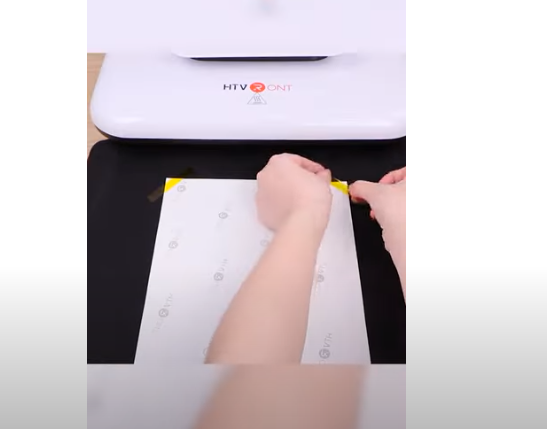
Step 4: Cover the image with a piece of parchment paper. You can buy parchment paper for a few bucks at any grocery shop, but you could also try using an unfolded brown paper bag.
Note: With the steam off, your heat press should be at medium heat.
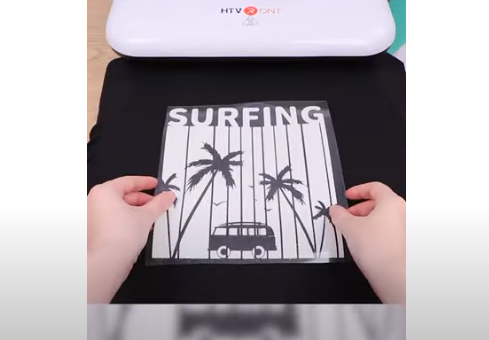
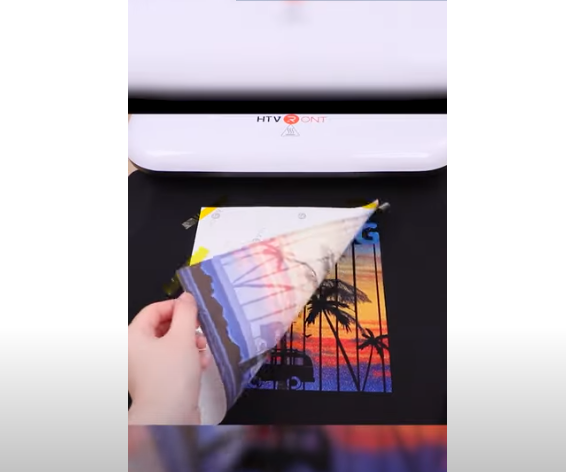
Step 5: Place your shirt with the design laid adequately into the HTVRONT heat press and allow it to heat for some seconds
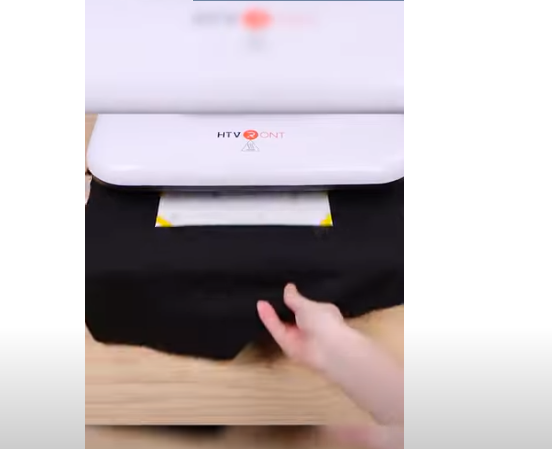
Give the shirt two minutes to cool before carefully peeling off the paper.
This approach is fast, enjoyable, and affordable but with no lasting outcomes. Please hand wash your garment to preserve the picture that you moved.
Part 3: How to transfer a photo to a mug
Step 1: Use a sublimation printer to print out your text or image at the proper size. Your image is printed using sublimation technology using heat-transferrable ink. In order to prevent the image from being mirrored when transferred to the cup, this printer also prints the image backward.

Step 2: Put the print where you want it on the cup, facing down. As the ink is nearly impossible to erase once attached to the cup, be sure the print is facing the correct direction.
Add pictures or text to your mug's handle, side, or bottom.
The approach works best on mugs with a smooth finish because rough finishes can cause the print to appear splotchy and uneven.
Step 3: Use heat-resistant tape to hold the print in place to ensure the print on your cup is crisp and clear. To keep the print in place, apply a strip of heat-resistant tape to each of its edges.
Step 4: Gently rub the warm object back and forth over the entire print until the paper firmly sticks, and the print's image begins to peek through. As evenly as you can, rub the iron over the print.

Invest in an automatic mug press if you plan to print numerous mugs for sale. Instead of using an iron, you may heat the sublimation print in the mug press.
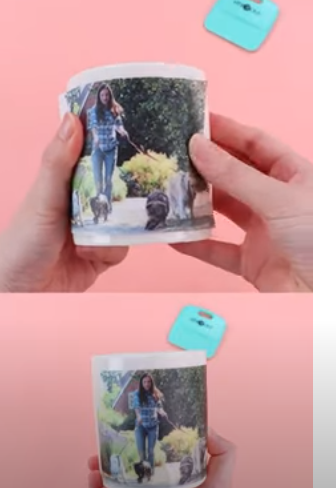
Step 5: Peel the tape back slowly before lifting the printing paper away from your mug. You can now use your newly printed mug!
Finally, to protect the print, avoid putting your customized mug in the dishwasher.
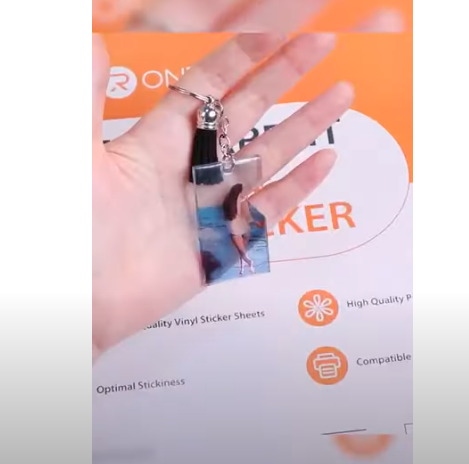
Part 4: How to transfer a photo to a Keychain
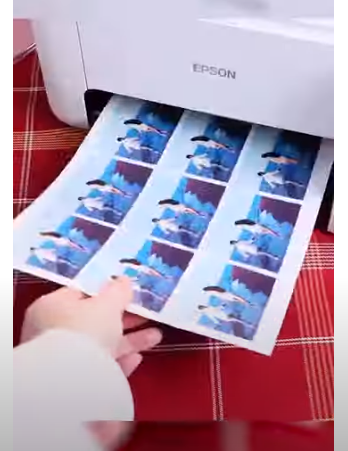
Step 1: Print your chosen image on a special transfer paper using sublimation ink, allowing for a wide range of colors and details. The image should be a mirrored version of what you want on your keychain. The size and shape of the print should match your keychain's dimensions, commonly around 4-5 cm in diameter for circular shapes or 4-5 cm in width for square/rectangular ones.
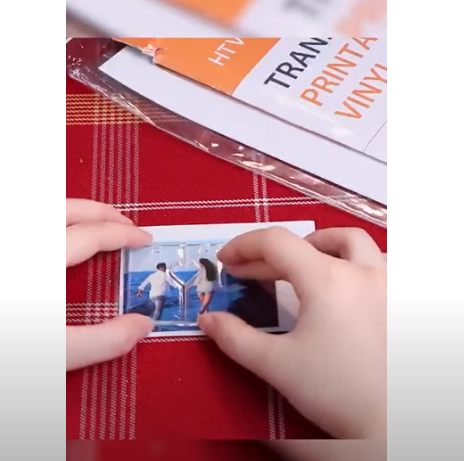
Step 2: Position the printed image facedown onto the keychain and secure it using heat-resistant tape. Eliminate gaps or air pockets between the image and the keychain's surface to ensure a smooth transfer.
Step 3: Place the secured keychain into a heat press machine. This machine applies controlled heat and pressure. The heat causes the sublimation ink on the transfer paper to turn into gas, which infuses the image onto the keychain's material. This process takes only a few minutes to complete.
Step 4: Remove the keychain from the heat press once the process is over. The image is permanently embedded onto the keychain's surface, ensuring it won't fade or wear off over time. Your personalized and uniquely designed keychain is ready for various customizations, including text, images, and designs.
Part 5: Summary and FAQs
Thus, with this guide, you can easily choose the right transfer paper for photos, follow the step-by-step instructions for transferring images onto shirts, mugs, and keychains, and helpful tips for lasting results.
Now, go ahead and bring your images to life in photo transfer paper.
FAQs:
Q1. What is photo transfer paper used for?
A: Photo transfer paper allows you to print images from your devices and transfer them onto different surfaces, such as shirts, mugs, and keychains, creating personalized items.
Q2. How does sublimation paperwork for shirt transfers?
A: Sublimation paper changes solid ink into gas when heat is applied, resulting in vibrant and long-lasting image transfers on fabric, making it ideal for customizing shirts.
Q3. Can I use regular photo transfer paper for mug transfers?
A: No, regular paper won't work. Sublimation technology and heat-resistant tape are essential for successful image transfers onto mugs.
Q4. Is the transferred image on a keychain permanent?
A: Yes, the image transferred onto a keychain using sublimation ink and heat press is permanent and won't fade or wear off over time.


![[Starter Kit] Auto Heat Press Machine 15" x 15" 110V + Starter Kit Bundle](http://www.htvront.com/cdn/shop/files/20240425-170634_385x.jpg?v=1714036345)
![[Premium Bundle] Auto Heat Press Machine 15" x 15" 110V + 20 rolls HTV Bundle 12“x3ft + Mini 2 Heat Press Machine + Random Sublimation & HTV Bundle ≥ $180](http://www.htvront.com/cdn/shop/files/1UK_4_22c12b1b-12dd-4105-ac25-93e2faae6a8c_385x.jpg?v=1713863580)


