


Are you a fan of those laser-etched leather hat patches? Then, you have found the right tutorial. You have likely come across social media and blog posts teaching you how to make hat patches. However, most of these posts won't answer common questions like what type of adhesive to use, proper heat settings, or the best heat press for the job. So, in this tutorial, we'll walk you through the step-by-step process to heat press patches on hats and where to get the most stylish designs for your project. Let's learn!
Part 1: How to Get a Hat Patch
This tutorial will start from scratch by discussing where to get heat press patches on hats. There are two ways to get heat press designs for your hat patches, and getting one won't cost you an arm or a leg. The first way is to get custom patches online by purchasing ready-made patches on platforms like Amazon and eBay. The good news is that most custom hat patches are available in numerous designs at affordable rates. For example, you'll spend around $10 on Amazon to get a pack of customizable iron-on patches.
Another way to get custom iron-on patches for hats is by designing them yourself. If you have some graphic design knowledge, use programs like Photoshop or Gravit Designer to create a cool and unique SVG design and apply it to an empty hat patch. Alternatively, you can hire someone on freelancing platforms like Fiverr and Upwork to design your preferred heat transfer designs at a small fee.
Part 2: How to Heat Press Patches on Hats
Now that you already have the ideal patches to transfer to your hat, let's learn how to do that. Heat press hat patches can be a bit complex to transfer due to the design on your surface. For this reason, we want to discuss the detailed steps on how to heat press patches on hats.
Step 1. Prepare the needed supplies.
Before shopping for the materials needed, it's vital to identify the ideal project. For example, you can buy standard hat heat press patches at most craft stores or go for sublimation patches, which are suitable for creating logo hats. But whichever project you choose, the good news is that you won't need a Cricut plotter to make them.
That said, below are the supplies needed to make iron-on hat patches. Remember, this list could be longer to include materials like sublimation paper, sublimation printer, and sublimation ink when creating sublimation patches.
- Cotton hat: Cotton is the best material for heat press. There is no debate about that!
- Hat heat press: Buy a convenient and flexible heat press machine such as HTVRONT Mini Heat Press.
- Heat-resistant mat: A professional-grade heat-resistant mat should help you evenly transfer heat and protect your table surface.
- Heat-resistant tape: You'll need this material to keep your hat design in place during heat transfer.
- Heat-resistant gloves: To protect your hand from potential burns, buy heat-resistant gloves.

Step 2. Adjust heat press settings: temperature, pressure, and time.
When transferring heat press or sublimation patches to your hat, a problem might arise if the heat or pressure is too high or too low. For this reason, mastering the correct heat press settings is essential. For instance, in this project, we used 150°C/300°F while pressing for around 15 seconds. This could reach 200°C/390°F when dealing with sublimation paper.
Below are the recommended time, temperature, and pressure settings for the hat heat press for patches:
|
Material |
Time |
Temperature |
Pressure |
|
Letter patches |
60 seconds |
150°C/300°F |
High |
|
Embroidered patches |
60 seconds |
150°C/300°F |
High |
|
Sublimation patches |
15 seconds |
150°C/300°F |
Medium |
Step 3. Transfer the patches to your hat.
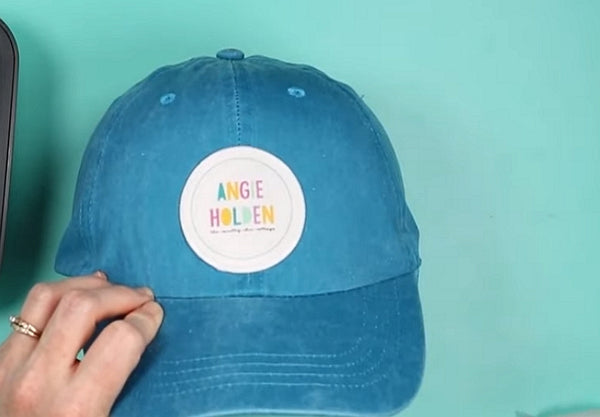
Now, the fun part begins in this tutorial. You'll start by adding the hat to a hat form to give you more control when transferring your designs. Once the hat is firm and tight on the front, gently place the design in your preferred position on the hat.

Remember to tape it down using heat-resistant tape. Cover the design using a butcher or sublimation paper, then apply pressure and heat. Avoid the temptation to move the heat transfer machine back and forth when applying pressure.
Step 4. Remove the patch from your hat.
After applying enough pressure and heat during the recommended time, remove the butcher paper, then allow your patch to cool down before removing the tape. Congratulations! You have just added a custom patch to your hat. That was easy, right?
Note: It's vital to read the instructional materials that come with custom hat patches for heat press. That's because these prints come with instructions on how to apply the patches using the right time, temperature, and pressure. You may also be advised to cover up the patch to protect it during the heat transfer process.
FAQs
1. What is the best way to heat press patches on hats?
You can transfer patches to a hat using iron-on vinyl or sublimation. With heat transfer vinyl, you'll bond the vinyl layer to your hat using heat and pressure. On the other hand, sublimation is more like engraving the design on the hat material. This makes sublimation more long-lasting than HTV.
2. What is the best heat setting for heat press patches on hats?
Anything between 300 and 370 degrees Fahrenheit is okay when applying hat patches using heat transfer or sublimation. However, the materials' heat, time, and pressure settings often vary. So, read the manual to know the exact heat press settings.
3. Why does my patch fail to stick on hat?
One of the reasons why your patch isn't sticking on the hat is failure to use the correct time, heat, and pressure settings. Therefore, use the correct heat transfer settings for the best results. Also, avoid peeling off the tape before it cools down or washing the hat before 24 hours.
4. How to heat press leather patches on hats?
Applying a leather patch isn’t like the normal ironing of a shirt! Use your iron like a heat press by pressing and holding the warmed iron to the area for 25-30 seconds before moving on to the next part. You may need to test with different times to get the best adhesion to avoid edges and corners coming up. You can save a lot of time and effort if you use a hat heat press for leather patches , and it's great for making hats.
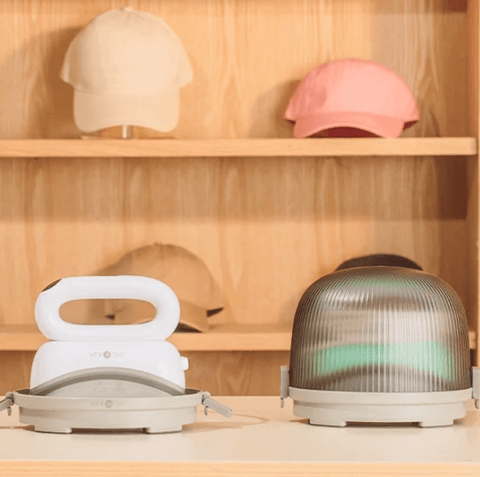
Unleash Your Creativity with HTVRONT Hat Heat Press
- A brand-new portable heat press exclusive to various hats.
- Intuitive display screen to monitor the ironing process.
- Customized design with the flexible temp and time settings.
Conclusion
There you have it! Whether you want to apply heat press leather patches for hats or any other material, this tutorial should help you out. Remember, you can use the same process to apply hat patches or visors, backpacks, jeans, and other unique materials. You don't have an excuse not to customize your hat with unique patches, do you?


![[Starter Kit] Auto Heat Press Machine 15" x 15" 110V + Starter Kit Bundle](http://www.htvront.com/cdn/shop/files/20240425-170634_385x.jpg?v=1714036345)
![[Premium Bundle] Auto Heat Press Machine 15" x 15" 110V + 20 rolls HTV Bundle 12“x3ft + Mini 2 Heat Press Machine + Random Sublimation & HTV Bundle ≥ $180](http://www.htvront.com/cdn/shop/files/1UK_4_22c12b1b-12dd-4105-ac25-93e2faae6a8c_385x.jpg?v=1713863580)


